Fall Decorating Mini-Series ~ Week 1: Pumpkin Floral Centerpiece
Happy October, ladies! I hope this month brings you a lot of joyful moments!
Today, I’m super excited to kick off my Fall Decorating Mini-Series. First things first, I’m not an expert decorator, by any means! I just have a passion for creating new things, and hopefully, you’ll get some inspiration to use in your own home.
I love working with faux flowers, so I thought this would be a good start to the mini-series. How would you like to make your very own arrangement for your Thanksgiving table? Let’s do this!
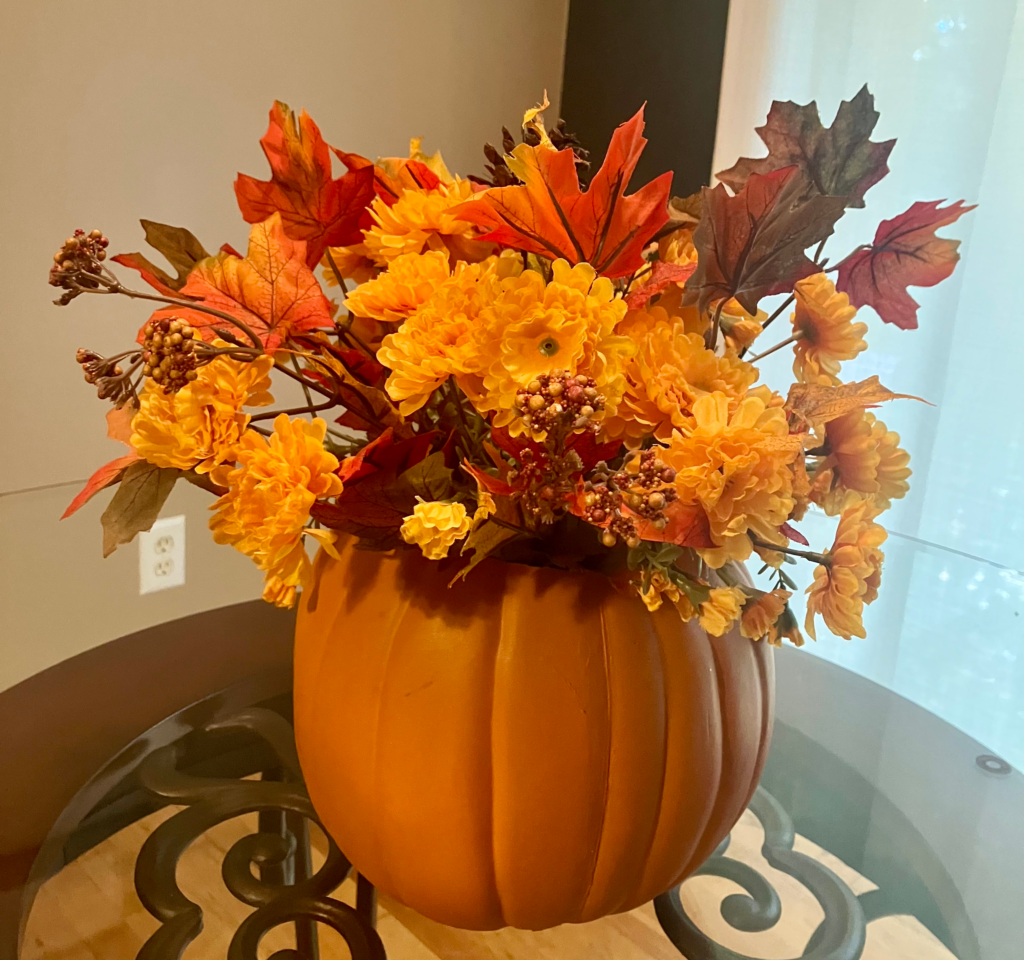
Pumpkin Floral Centerpiece
You may have seen these displayed in department stores in your town. I see them every year right about this time. I also notice the high price tags! Um, no thank you!
I actually made this centerpiece many years ago, but for this post, I took it apart and made it again so I could show you exactly how I did it.
Okay, let’s get on with the show!! LOL
Here is the list of supplies you will need, and ladies, I’ll let you in on a little secret: a lot of these things can be found at the local dollar store!
SUPPLIES:
1 – 9″ orange craft pumpkin – I usually purchase these at the craft store. Price approximately: $8.00 when I use a coupon.
1 – green floral dry foam – This has to fit snugly inside the craft pumpkin, so you will generally need a diameter of 4″ – 5″. Our dollar store doesn’t always carry these in stock, but the craft stores should definitely have them. Price approximately: $6.00/pack of 3.
1 – mini hot glue gun – I purchase this at the craft store. Price approximately: $5.00
1 pack – 4″ mini glue sticks – I purchase these at the craft store. Price approximately: $5.00
Assortment of Fall Floral Stems – I typically purchase my flowers from the craft stores and dollar stores. Total Price approximately: $10.00 – $13.00
1 pair – wire cutters or strong pliers – Now don’t you laugh, but I actually use a basic pair of sharp scissors!
1 – serrated or craft knife – Ladies, I use a small steak knife! LOL
Alrighty now, let’s bring this centerpiece to life…
DIRECTIONS FOR MAKING A PUMPKIN FLORAL CENTERPIECE:
Step 1: Gather all of your supplies.
Step 2: Using wire cutters, strong pliers, or sharp scissors (the Chelle Noelle way! LOL), take the bunch of flowers and cut each stem so you have individual flower stems. Remember, you want them long so you can arrange them in the pumpkin.
Step 3: If you’re using a few different types of faux flowers, it may be easier to separate the stems into piles so you can see what you have to work with.
Step 4: Using a serrated or craft knife (or a simple small steak knife – the Chelle Noelle way once again!), carve the top of the craft pumpkin, just as you would with a real pumpkin. There’s no right or wrong way to do this, and the best part? There are no yucky, slimy, messy insides!
Step 5: Plug in your mini glue gun and wait about 4-5 minutes for it to heat up.
Step 6: Ready to make your beautiful fall table decoration? Okay, here comes the fun part!!!
Take your green floral dry foam and make sure it’s going to fit inside your pumpkin. I had to trim my foam so it was snug inside the pumpkin.
Step 7: So, after you have made any adjustments to the foam, take your hot glue gun…warning…yes, the glue is hot! So please be careful.
I can’t even tell you how many times I’ve accidentally touched that darn hot glue. My mom used to yell, “OUCH!” whenever she’d mistakenly touched it…a little drama scene…sorry, Momma!
Put the hot glue all over the bottom of the green dry foam. Place the bottom side down in the pumpkin and apply gentle pressure for a few seconds.
NOTE: This is the only thing you’ll need the glue gun for on this project. So, if you have some super-strong double-sided tape (like Alien Tape) hanging around the house, you can simply use that on the bottom of the foam in place of the hot glue. OUCH! lol
Step 8: Take each flower, one by one, and poke the stem into the foam. Arrange them however you’d like.
Like I mentioned earlier, I love working with faux flowers because you can bend them. You can make your floral display look as full as you want.
Step 9: Take a step back and look at what you just made…a gorgeous pumpkin floral centerpiece that you’ll have for years and years.
What a joyful moment!!!
Ladies, I hope you had fun with Week 1 of my Fall Decorating Mini-Series on A Cup for the Next Chapter.
Enjoy your day, and don’t forget to take pictures of your new creation!
I’ll talk to you tomorrow!
~Chelle Noelle~